Thursday, April 30, 2020

Bonkers for Bitmojis


In this time of distance learning, it can be easy to become distracted.  I have become absolutely obsessed with creating headers, agendas, digital stickers, and even video messages using personalized Bitmojis.  I am not alone!  So many educators have become bonkers for Bitmojis.  The Bitmoji craze is spreading and it is coming to a Google app near you!

In today's blog, I am going to share some of the ways I have used Bitmojis, but be careful, you too might catch the "Bitmoji obsession."

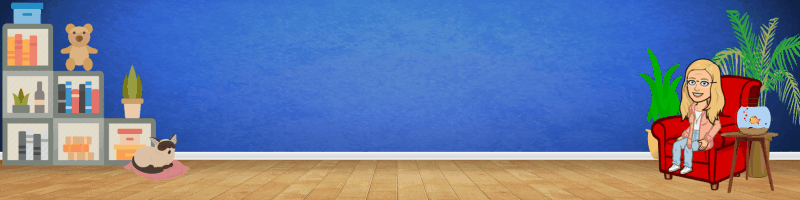
Google Classroom Banners
I love to change up my headers and I have been doing so for a while, but my Google Classroom headers came to life when I started adding my personalized Bitmoji.


Google Classroom allows an educator to personalize their banner.  To create mine, I used a Google Slide.   Check out my tutorial to create your own personalized banner.


You can create animated headers for your Google Classroom too.  Animation can be fun and an animated header can really make your Google Classroom stand out.  I made this one with a very hyper cat using the web application, https://talltweets.com/


Sending Students Digital Stickers

As difficult as distance learning is on teachers, it is even more difficult for their students.  Kids are social beings and forced isolation can take a toll.  Personalized Bitmoji messages can brighten a kid's day.  Everybody needs to hear that they are "Toad-ally" awesome once in a while!

Weekly Assignments and Agendas


I use agendas to help keep all of us on track.  My agendas are just a Google slide with our "to-dos," but Bitmoji helped me to personalize and fancify them.

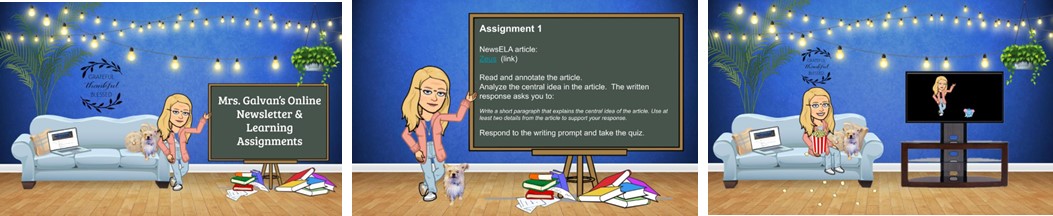
My personalized agendas often include my dogs Coco and Roxie.  I use the application Remove.bg to remove the background from Bitmojis and photos.  Watch my short tutorial below to see how.

Bitmoji  Videos

Bitmojis are even awesome for video messages.  I used the application Filmora to create this video almost entirely with Bitmojis.


Now, I am going to share a secret that helped me to create with Bitmojis. It is a game-changer!  Are you ready?  Remove.bg, https://www.remove.bg This website allows you to upload pictures and remove the background AND even make some basic edits.  You are going to love this tool!  This tool is what I used to make my Bitmoji header, to add my dogs to my banner, and to create my Toad-ally awesome sticker.  I have created a short tutorial below, but it is really, really easy to do.


Oh yes!  I know ideas are swimming in your head and you can't wait to create your own Bitmoji project.  When you do, you too will become, bonkers for Bitmojis!

Friday, April 3, 2020

Going Digital With Interactive Notebooks


I used Interactive Notebooks for years in my classroom.  I love the idea of Interactive Notebooks.  I think it is vital to teach students to save important information as they are learning.  I used Interactive Notebooks as a hands-on approach to notetaking, providing my students with a go-to place to house their learning.  I use to call ours, "Our Scholar Book of Knowledge."  Interactive Notebooks have many benefits, but after a while, I became frustrated with some of the aspects of routinely using them in the classroom.  First, I grew to hate having students cut and glue things in their spiral notebooks.  It took forever, and my room always looked like a herd of hampsters had overtaken it.  Oh, the paper!  The tiny bits of paper all over everything...


AND, the glue!!  For goodness sakes, you would think that middle school students would have mastered this skill!

Even when no cutting or gluing was involved, our notebooks took time.  They took time to find them, to write notes and to organize.  I had other problems too.  Students would lose them and there was no way to make up a semesters worth of notes.  Even student absences were an issue.  I would have to help them fill in their missing sections.  I was ready to bail on the notebooks.  I needed a change.


A coworker and I decided that we would go digital with our notebooks.  We needed a platform and we decided to use Google Slides.  Slides are great for presentations, but also make magnificent platforms for digital learning.  I had already used slides for interactive lessons and digital scavenger hunts, but we decided to take digital learning with Google Slides to the NEXT LEVEL.  Going Digital with my Interactive Notebooks has fundamentally changed my teaching.


I have used Interactive Digital Notebooks or IDNs in my classroom for 7 months now.  The benefits of going digital with my notebooks will require more than a single post.  It has been a remarkable experience.  In future posts, I will provide practical advice for getting started, as well as tips I have learned along the way, but for now, let me share some of the benefits I found.


  1. Going digital saves paper.  I spend a lot less time at the copier AND I'm killing way fewer trees.
  2. Students cannot lose Digital Notebooks!  My students' notebooks are always safely located in their Google Drives.
  3. Students can always access their notebooks.  As long as my students have an internet connection, they can access their Digital Interactive Notebooks from anywhere.  They can even access their notebooks on their phones!
  4. If a student is absent, I can post my presentation notes on Google Classroom and catch them up, easy-peasy.
  5. Because I share our notebooks with my students through Google Classroom, I can see their notebooks at any time, and anywhere.  No more notebooks piled up on my desk waiting for me to grade.  
  6. Digital Notebooks are interactive in a way that paper notebooks can never be.  I can provide students to links to websites and I can embed videos.  I can have them write in notes or annotate a reading selection.  They can compose a written response or they can simply interact with a slide by moving things around to demonstrate and/or build their learning.  The possibilities are truly endless and I can't wait to share them!


Contact me by email at teacherdigitaltrends@gmail.com
Twitter at https://twitter.com/BGoogley
Join us at our Facebook group - beGoogley 


Tuesday, March 31, 2020

Creating Dynamic Interactive Student Work Spaces in Google Slides


I use Digital Interactive Notebooks (or DINs) in my ELA classroom.  In this blog post, I am going to share one of my secrets for creating dynamic interactive student workspaces in Google Slides.

I want you to see your Google Slide as a blank canvas.  Ask yourself, "What do I want my students to do on this slide?"  If you can imagine it, you can make it!

But after you have created your amazing student workspace, how can you keep your students from moving parts of or deleting your masterpiece?  Trust me, they will!

Shhhhh, don't tell anyone, but one of the best tricks for creating your own dynamic interactive student workspaces involves altering the background in Google slides.

When studying fiction, I created an interactive Plot Diagram for students to analyze the parts of a short story we were reading.  After spending time creating the slide, I definitely didn't want my students to move parts of the diagram around.  What a mess that would be!

Keeping a digital interactive workspace intact takes 2 easy steps!

First, make your slide a jpeg (or a picture).

You might be thinking, "What, you can do that?"

Yes, you can!

With Google Slides open, select the slide you want to make a jpeg.  Then,
1. Click on File
2. Select Download, JEPG image (.jpg, current slide)

Now just select where you want to save it!  Easy Peasy right!

You're halfway there!

Once you've converted your slide into a picture, you can upload it back into your slide.  Now you could just click Insert, Image and then upload it from your computer, but your students can still (and will) delete it.  What I prefer is to make the image the slide's background.

To make your image your background, create or select a blank slide.

1.  Click on Background
2.  Select Image, Choose Image
3.  Locate and Upload your image in Drive or from your computer.

Ta-da!  You have created your perfect student workspace!  You can now layer on top to create text boxes for students to write in, or you can create a moveable, interactive worksheet!


Here are just a few examples of some student workspaces I created for my DINs.


Remember, your slide is your canvas and anything you imagine, you can create!  After you have created your masterpieces, come back and share with us some of the ways you were able to be Google!


Contact me by email at teacherdigitaltrends@gmail.com
Twitter at https://twitter.com/BGoogley
Join us at our Facebook group - beGoogley


Monday, March 30, 2020

Embedding Video in Your Digital Interactive Notebooks


I went digital with my interactive notebooks two years ago and the change dramatically changed my lesson delivery and my students' learning.  Now that digital learning is everything in both teaching and learning, I want to share with you some basics for embedding videos in your Digital Interactive Notebooks (or DINs) and provide with you a few ideas on how adding videos to your DINs can dramatically enhance both your teaching and student learning.

Videos in the classroom can serve many purposes.  Videos can be a practical and dynamic edition to any lesson.  When providing my students with background information, for example,  many of us will use videos to help students to understand key concepts, build background and make connections.  You can easily embed YouTube videos in your DIN.

To embed a video:
1.  Click Insert on the menu bar.
2.  Select Video.

A window will appear where you can select a YouTube video; select a video by pasting a URL or you can embed a video from your Drive.  Once you've made your selection, click select.


Congrats!  Your video is now embedded in your Google Slide.  As with images, your video is free-floating.  You can resize it and move it where ever you want on the slide.  You also have the option to format your video to meet your particular needs.  In edit mode, right-click on your video.  A window pops up.  Next,
1.  Click on Format options.
2.  Select Video playback.

Here you have a few options.  Google Slides actually allows you to do some basic video editing.  You can decide when to have your video start and stop.  This is especially nice if a video is 20 minutes long and you only really want students to view five minutes of it.

You can also have a video begin immediately when a slide changes in presentation mode or you can mute a video's sound.

I've used videos to introduce new concepts and to deepen learning.  I have even created my own videos using Screencastify and embedded them through Google Drive.

Once you've embedded videos in your DIN, students can watch them in both the editing and presentation modes in Slides.   Often, I create a textbox where I ask students to respond to the video after they watch it.  In the Gillette commercial to the right, I asked my students to analyze the rhetorical devices used and to form an opinion regarding the effectiveness of the persuasive techniques.  Videos can absolutely enhance student learning and by embedding them in your digital interactive notebook, you make that video available anytime, anywhere.  Truly, the ability to embed videos option has definitely been a game-changer in my classroom!  I invite YOU to share your own ideas for embedding videos in Google Slides!  Share the amazing ways you have learned to "be Googley"!


Contact me by email at teacherdigitaltrends@gmail.com
Twitter at https://twitter.com/BGoogley
Join us at our Facebook group - beGoogley

Monday, April 22, 2019

Setting Up Digital Interactive Notebooks

Thinking about going digital with your interactive notebooks?  Oh, where to begin?  I started with my curriculum and what I am required to teach each grading period.   Then, I decided to use Google Slides as my platform for creating my Digital Interactive Notebooks or DINs.  Google Slides are great for presentations, but Slides can also be an amazing platform for both teaching and student learning.  Slides allow for the embedding of links and video.  Content can also include text and pictures which can be manipulated and/or moved around to demonstrate learning.  Slides also feature the amazing Explore Tool which provides students with a controlled, safe resource for research, embedding their own pictures, etc.  The possibilities are just endless and I think, even after a year, that I have just scratched the surface of what I can do with slides!


I decided early on that I wanted some continuity with my notebooks.  Slides default at widescreen - 16:9.  I change the size to 8.5:11.  I want our notebooks to mimic paper notebooks AND 8.5:11 means I can easily print out pages of our notebook if I ever need to.   I also decided to create a notebook per grading period.  Each grading period our DINs easily contain a hundred + slides.  This is because our Digital Notebooks contain our reading selections in addition to our literary concepts.  It is an all in one teaching & studying tool.  Our notebooks are the foundation for all our learning and we used them daily.

Each DINs has a cover slide where students add their name.  The cover helps to make the notebook their own and makes the resource a little more formal.  In addition, as students add their own names, I get to teach them some cool skills which I need them to know like how to change the font, the size, the color, etc.  Our Notebooks also include our student objectives for our current grading period.  It is important to me that students know what our academic focus is.


In my district, every grading period focuses in on a Literary Genre.  In our DINs students know upfront what they will be expected to learn.

There are some things I have learned along the way.  First, when building your notebook remember, you are not limited to the slide.  Digital Interactive Notebooks are typically not used in presentation mode.

For example, when reviewing Growth and Fixed Mindsets in our first grading period's DIN,  students would simply drag and drop to sort Fixed and Growth Mindset statements.


This allowed for a quick check of their level of comprehension.  Notice that when Google Slides is in edit mode, the foreground of the slide is a usable space.  In our Growth Mindset activity, the foreground housed our mindset statements.  Other times, the foreground became where we annotated our stories.  Cool right?!

Whatever your subject, whatever your grade, going digital with your Interactive Notebooks can be a powerful way to take your student learning to the NEXT LEVEL!

Contact me by email at teacherdigitaltrends@gmail.com
Twitter at https://twitter.com/BGoogley
Join us at our Facebook group - beGoogley


Wednesday, July 25, 2018

Google Classroom Student Orientation


Google Classroom Enhances Student Learning!

          I've been using Google Classroom for two years now and I have found it invaluable for student learning.  Google Classroom is an amazing platform for delivering curriculum and lesson content for any subject in almost any grade.  In addition, Google Classroom is a powerful communication tool for both teachers and students.  


 Students Need to Understand How to Use Google Classroom to Effectively Use It


          Google Classroom is easy for both teachers and students to use.  But last school year I realized that my students were not utilizing Google Classroom to their full potential and that they were asking me basic questions about navigating Classroom's features.  This was MY FAULT!  I failed to fully orientate them with the Google Classroom platform and features when I enrolled them.  Vowing to do better, I created a Student Orientation video to help students better understand some basic features in Google Classroom such as:
  • Navigating Classroom
  • Classroom's stream
  • Differences between Announcements, Assignments, and Questions
  • How to Turn Assignments in
  • Private and Public Comments
  •  The About Resources Tab
  • Using Google Calendar
  • Noting Upcoming Assignments
  • Navigating Topics     

In addition to the orientation video, I uploaded this Student Quick Guide to Google Classroom created by Alice Keeler. http://goo.gl/1ZCJpZ

Google will be pushing out new Classroom updates this Fall!  Subscribe to my blog to receive updated Google Classroom information and videos.  

I hope this post will help you to be a little more Googley!


Tuesday, July 17, 2018

Discover the Benefits of Teaching with Google Classroom!


Discover the Benefits of  Teaching with Google Classroom! 


I began using Google Classroom as my primary lesson and assignment delivery platform two years ago and it has fundamentally changed my way of teaching.  The reasons why I teach with Google Classroom are MANY!  Besides being free (and what teacher doesn't like free) Google Classroom enhances classroom teaching by:

  • Making collaborative learning easy.
  • Providing a platform for transparent and seamless communication.
  • Providing students with easy access to materials used in instruction.
  • Allowing differentiation in student instruction, materials, and activities.
  • Establishing a method for learning in a way that students learn best - with technology!
  • Keeping both teachers & students organized.
  • Allowing for real-time feedback.
  • Creating a seamless integration of G-suit...
and so much more!

If you are new to Google Classroom or if you just need a refresher, I have created this Google Classroom Basics video just for you.


Become part of the Google Classroom community and share your accomplishments, your tips & tricks and any issues you encounter by providing your comment below.  I hope this post will help you to be a little more Googley!